Discovering and multiplexing MCP servers using Agent Gateway

Recently I have been looking at how to deploy multiple model context protocol (MCP) servers in a Kubernetes environment such that agents can discover and use them dynamically as they are deployed. This led me to a project that was originally called MCP Proxy which in months of its inception and with the announcement of Google's A2A, was rechristened to Agent Gateway. The project is developed by, as far as I can tell, the team behind the CNCF project kgateway - originally known as Gloo and developed by Solo.io.
Why is this useful? This approach abstracts service discovery for developers, allowing agents to dynamically connect to MCP servers via a single endpoint, streamlining the development workflow. Operationally, a single gateway multiplexes requests to numerous backend servers, simplifying configuration and reducing connection overhead. As server instances are added or removed, they are automatically discovered, allowing the system to adapt to cluster changes without manual intervention, which creates a more manageable deployment.
In this article, we will introduce the core concepts that make dynamic discovery of MCP servers possible using Agent Gateway. We'll then walk through deploying kgateway and Agent Gateway on a Kubernetes cluster. Finally, we'll demonstrate how to deploy several different types of MCP servers and make them accessible through a single, unified Agent Gateway endpoint.
Multiplexed MCP Servers
mcp-server-standard server are listed. Once the corresponding Kubernetes service is deleted, the following command to list tools no longer list the tools from the removed server. The demo above is using Terraform code to create a kind cluster, deploy Gateway API, Agent Gateway and MCP servers.
The Concepts
Agent Gateway Listener
A Listener in Agent Gateway is a network endpoint that accepts incoming connections from client applications (like AI agents). It's a server component that listens on a specific address and port. Out of the box, the project supports MCP and A2A listeners. For our purposes, the MCP Listener is key, as it provides the single endpoint your agents will use to discover tools from all deployed MCP servers.
Agent Gateway Target
A Target is a backend service to which the gateway forwards requests. Agent Gateway supports multiplexing for MCP Targets, which allows us to federate or combine tools from multiple distinct MCP servers into a single, unified source.
Discovery Service
Agent Gateway uses the xDS (Discovery Service) protocol to dynamically update its configuration for targets and listeners without requiring restarts. Originally developed by Envoy and now maintained by the CNCF xDS API working group, xDS uses gRPC streaming to maintain a connection between the gateway and a control plane. This allows configuration changes — like adding a new MCP server — to be propagated immediately.
Think of xDS as the central nervous system for your service mesh. When you deploy a new MCP server and its corresponding Kubernetes Service, kgateway (the control plane) detects it and uses xDS to inform Agent Gateway (the data plane) about the new target, making it instantly available.
The Prototype
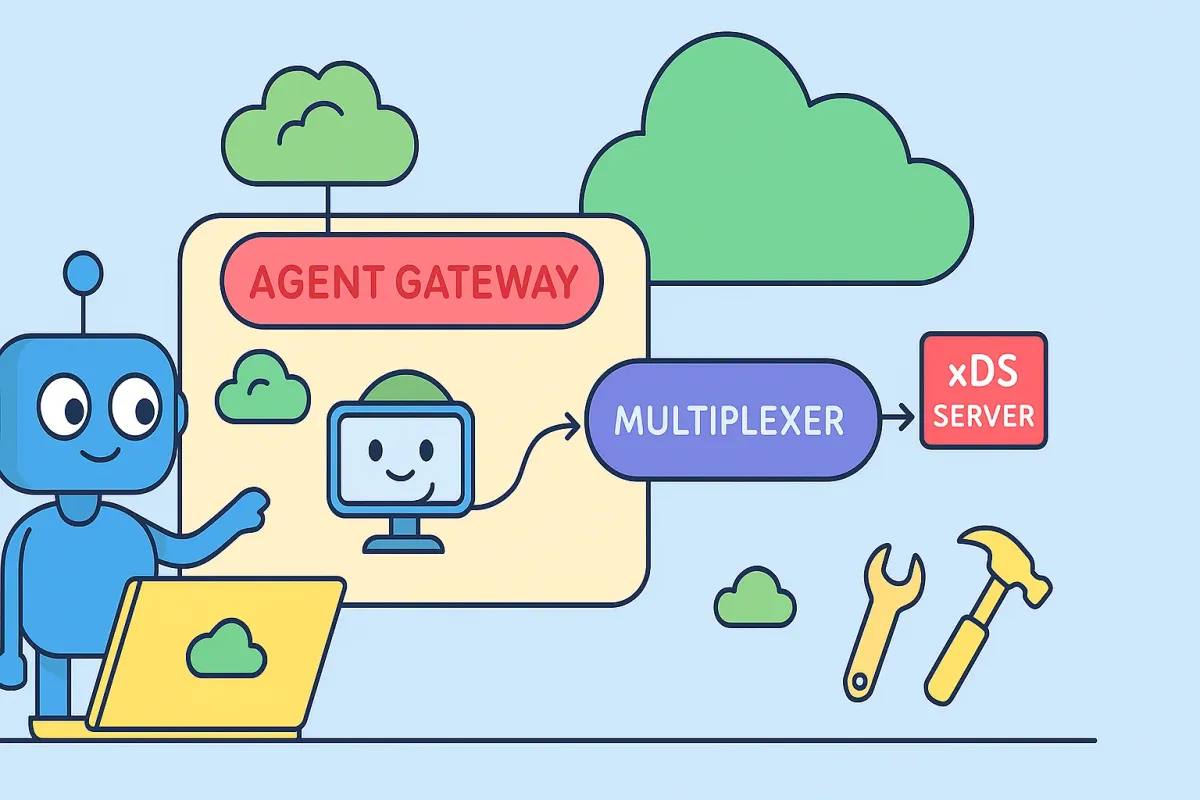
Great, now that we have the concepts above down and with kgateway recently merging the change to integrate Agent Gateway , we can try to implement something similar to what is shown below.
graph TD
    subgraph "kgateway"
        xDS_Server[xDS Server]
    end

    subgraph "Agent Gateway"
        Listener[Listener: MCP]
        Target[Target: MCP Multiplexer]
        AgentGateway[Agent Gateway]
    end

    subgraph "Backend Services"
        MCP_Server_1[MCP Server 1]
        MCP_Server_2[MCP Server 2]
        MCP_Server_N[MCP Server N]
    end

    ClientApp[Client Application/Agent] -- "Connects to" --> Listener
    Listener -- "Forwards requests to" --> AgentGateway
    AgentGateway -- "Discovers and configures" --> xDS_Server
    AgentGateway -- "Routes to" --> Target
    Target -- "Federates tools from" --> MCP_Server_1
    Target -- "Federates tools from" --> MCP_Server_2
    Target -- "Federates tools from" --> MCP_Server_N

    style Listener fill:#f9f,stroke:#333,stroke-width:2px
    style Target fill:#ccf,stroke:#333,stroke-width:2px
    style AgentGateway fill:#9cf,stroke:#333,stroke-width:2px
    style xDS_Server fill:#f99,stroke:#333,stroke-width:2px
    style ClientApp fill:#9f9,stroke:#333,stroke-width:2px
Prerequisites
Before we start, we should have a Kubernetes cluster that has the Gateway API available. If you want to use an existing cluster, you may do so. But as we are experimenting and things can break, I'd recommend you use a new kind cluster. You can also bring your own development/ephemeral cluster as long as it is configured and accessible for kubectl.
Kubernetes Cluster
Assuming you have kind installed and available, you can run the following to start a brand new cluster.
kind create clusters --name=kgateway
Gateway API
Once the cluster is ready, you will want to install the latest released version of the Gateway API. In this example we use the 1.3.0 standard release. This is a prerequisite for the kgateway installation.
kubectl apply -f https://github.com/kubernetes-sigs/gateway-api/releases/download/v1.3.0/standard-install.yaml
Install kgateway
We install kgateway with Agent Gateway enabled. Since the introduction of the Agent Gateway data plane is very new, we use the v2.1.0-main rolling release here. We install this via Helm.
KGATEWAY_NAMESPACE=kgateway-system
KGATEWAY_VERSION=v2.1.0-main

# Install CRDs for kgateway.
helm upgrade -i --create-namespace --namespace ${KGATEWAY_NAMESPACE} \
    --version ${KGATEWAY_VERSION} \
    kgateway-crds oci://cr.kgateway.dev/kgateway-dev/charts/kgateway-crds

# Intsall kgateway.
helm upgrade -i --namespace ${KGATEWAY_NAMESPACE} \
    --version ${KGATEWAY_VERSION} \
    --set agentGateway.enabled=true \
    kgateway oci://cr.kgateway.dev/kgateway-dev/charts/kgateway
You can wait for the deployment to complete using the following command.
kubectl wait pod -n ${KGATEWAY_NAMESPACE} \
  -l app.kubernetes.io/name=kgateway \
--for=condition=Ready--set agentGateway.enabled=true as this ensures that the Agent Gateway is configured and available.If everything goes well and we have correctly configured agentGateway.enabled, you can execute the following command to see the available gateway classes. You should see agentgateway as one of the available classes.
kubectl get gatewayclass
NAME                CONTROLLER              ACCEPTED   AGE
agentgateway        kgateway.dev/kgateway   True       98s
kgateway            kgateway.dev/kgateway   True       98s
kgateway-waypoint   kgateway.dev/kgateway   True       98s
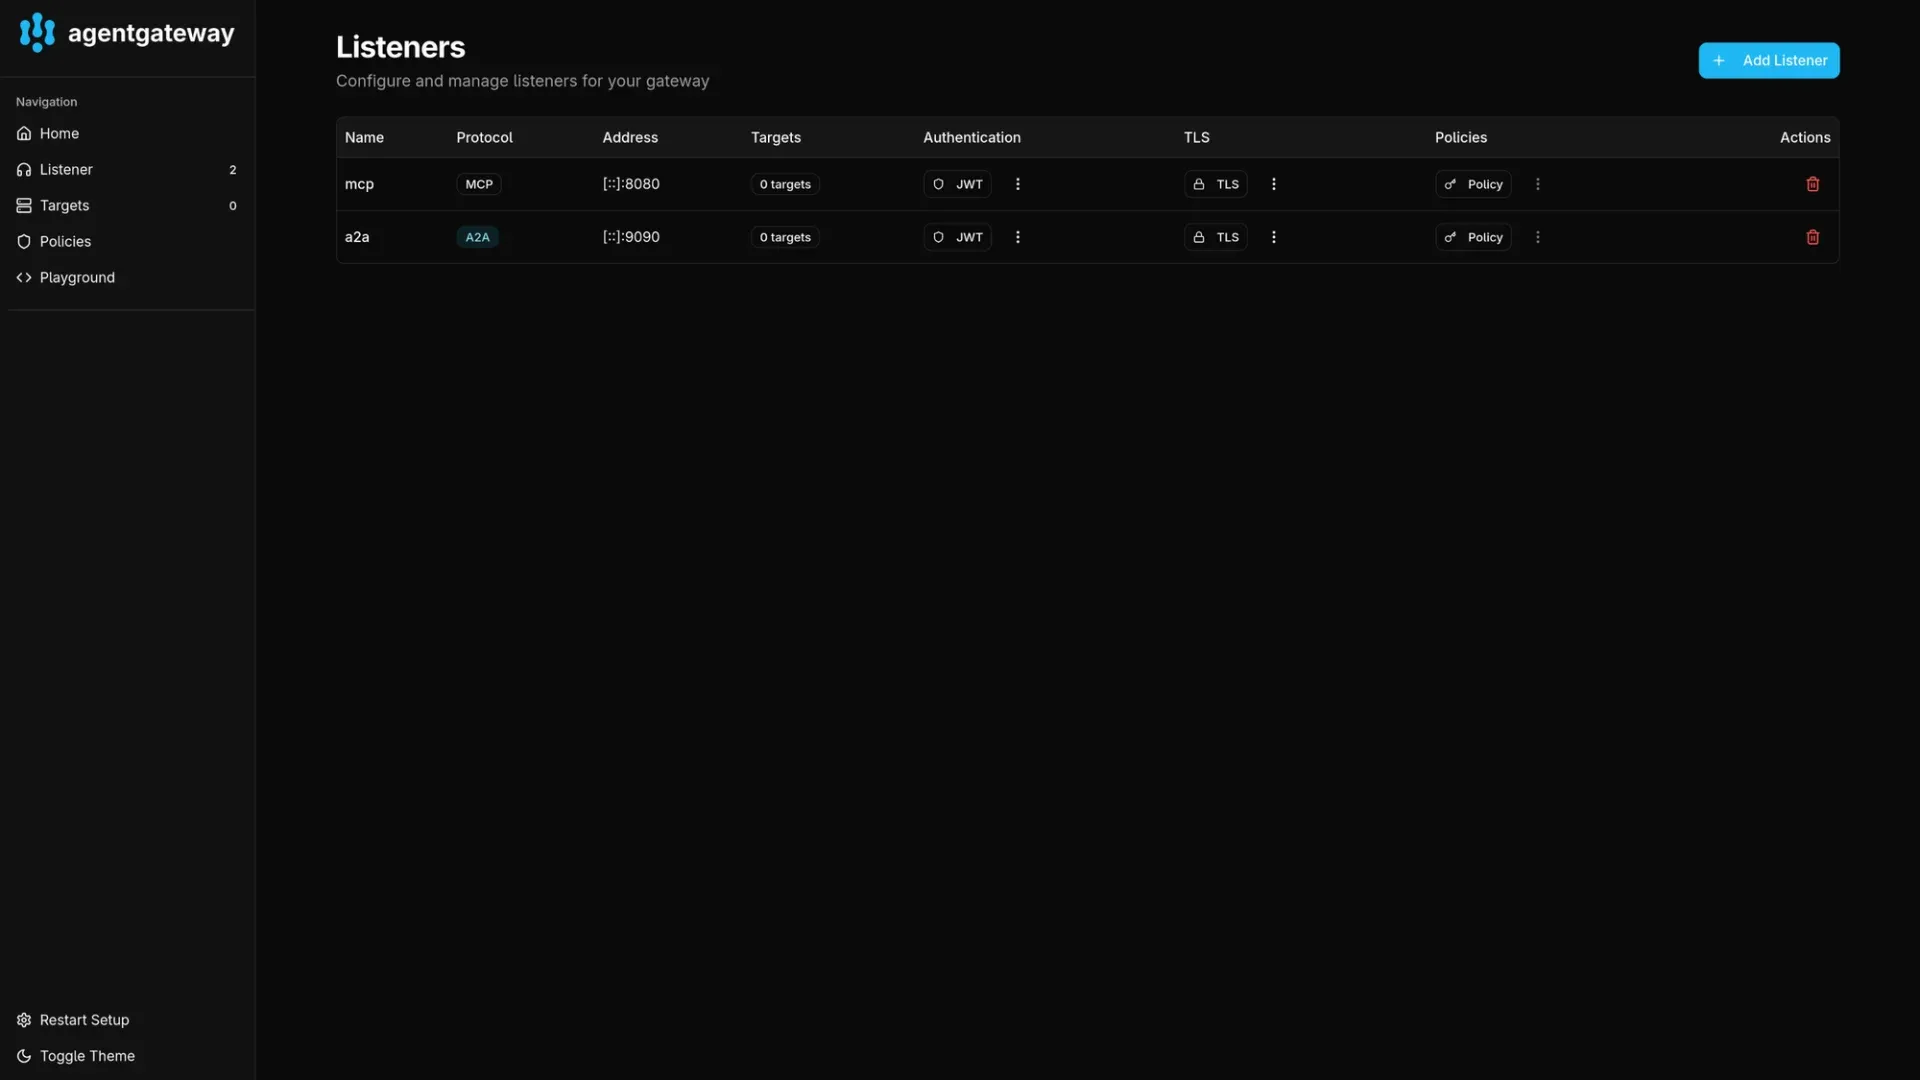
Deploy Agent Gateway Instance
Once the gateway class is installed, you can configure an instance of the Agent Gateway by applying the following manifest. This will create an instance of the gateway that has both MCP and A2A listeners configured. The protocols (eg: kgateway.dev/mcp) are important here, this is what allows services to be attached to the gateway.
kubectl --namespace=default apply -f- <<EOF
apiVersion: gateway.networking.k8s.io/v1
kind: Gateway
metadata:
  name: agent-gateway
  namespace: default
spec:
  gatewayClassName: agentgateway
  listeners:
    - name: mcp
      port: 8080
      protocol: kgateway.dev/mcp
      allowedRoutes:
        namespaces:
          from: All

    - name: a2a
      port: 9090
      protocol: kgateway.dev/a2a
      allowedRoutes:
        namespaces:
          from: All
EOF
Instance allowing route attachment from all namespaces
Customizing route attachments
In the above example, all namespaces are allowed to attach routes to this gateway. We can choose to be more restrictive using selectors. The following examples show the use of expressions and labels. The provided terraform code simplifies this for you.
allowedRoutes:
  namespaces:
    from: Selector
    selector:
      matchExpressions:
        - key: kubernetes.io/metadata.name
          operator: In
          values:
            - default
Restrict namespaces using expressions
allowedRoutes:
  namespaces:
    from: Selector
    selector:
      matchLabels:
        shared-agent-gateway-access: "true"
Restrict namespaces using labels
Verifying the deployment
This should trigger the deployment of an instance and you should be able to see the pod in the default namespace. And a corresponding config map named agent-gateway.
kubectl --namespace=default get pods
NAME                                  READY   STATUS             RESTARTS        AGE
agent-gateway-678bdfb464-tjmsw        1/1     Running            0               28m
kubectl --namespace=default get configmaps agent-gateway -o 'go-template={{index .data "config.json"}}'
{
  "type": "xds",
  "xds_address": "http://kgateway.kgateway-system.svc.cluster.local:9977",
  "metadata": {},
  "alt_xds_hostname": "agent-gateway.default.svc.cluster.local",
  "listeners": []
}
The config file above configures the kgateway xDS address this gateway instance will use to discover supported targets as they become available. If using Agent Gateway without kgateway, you can configure an alternative xDS address as needed.
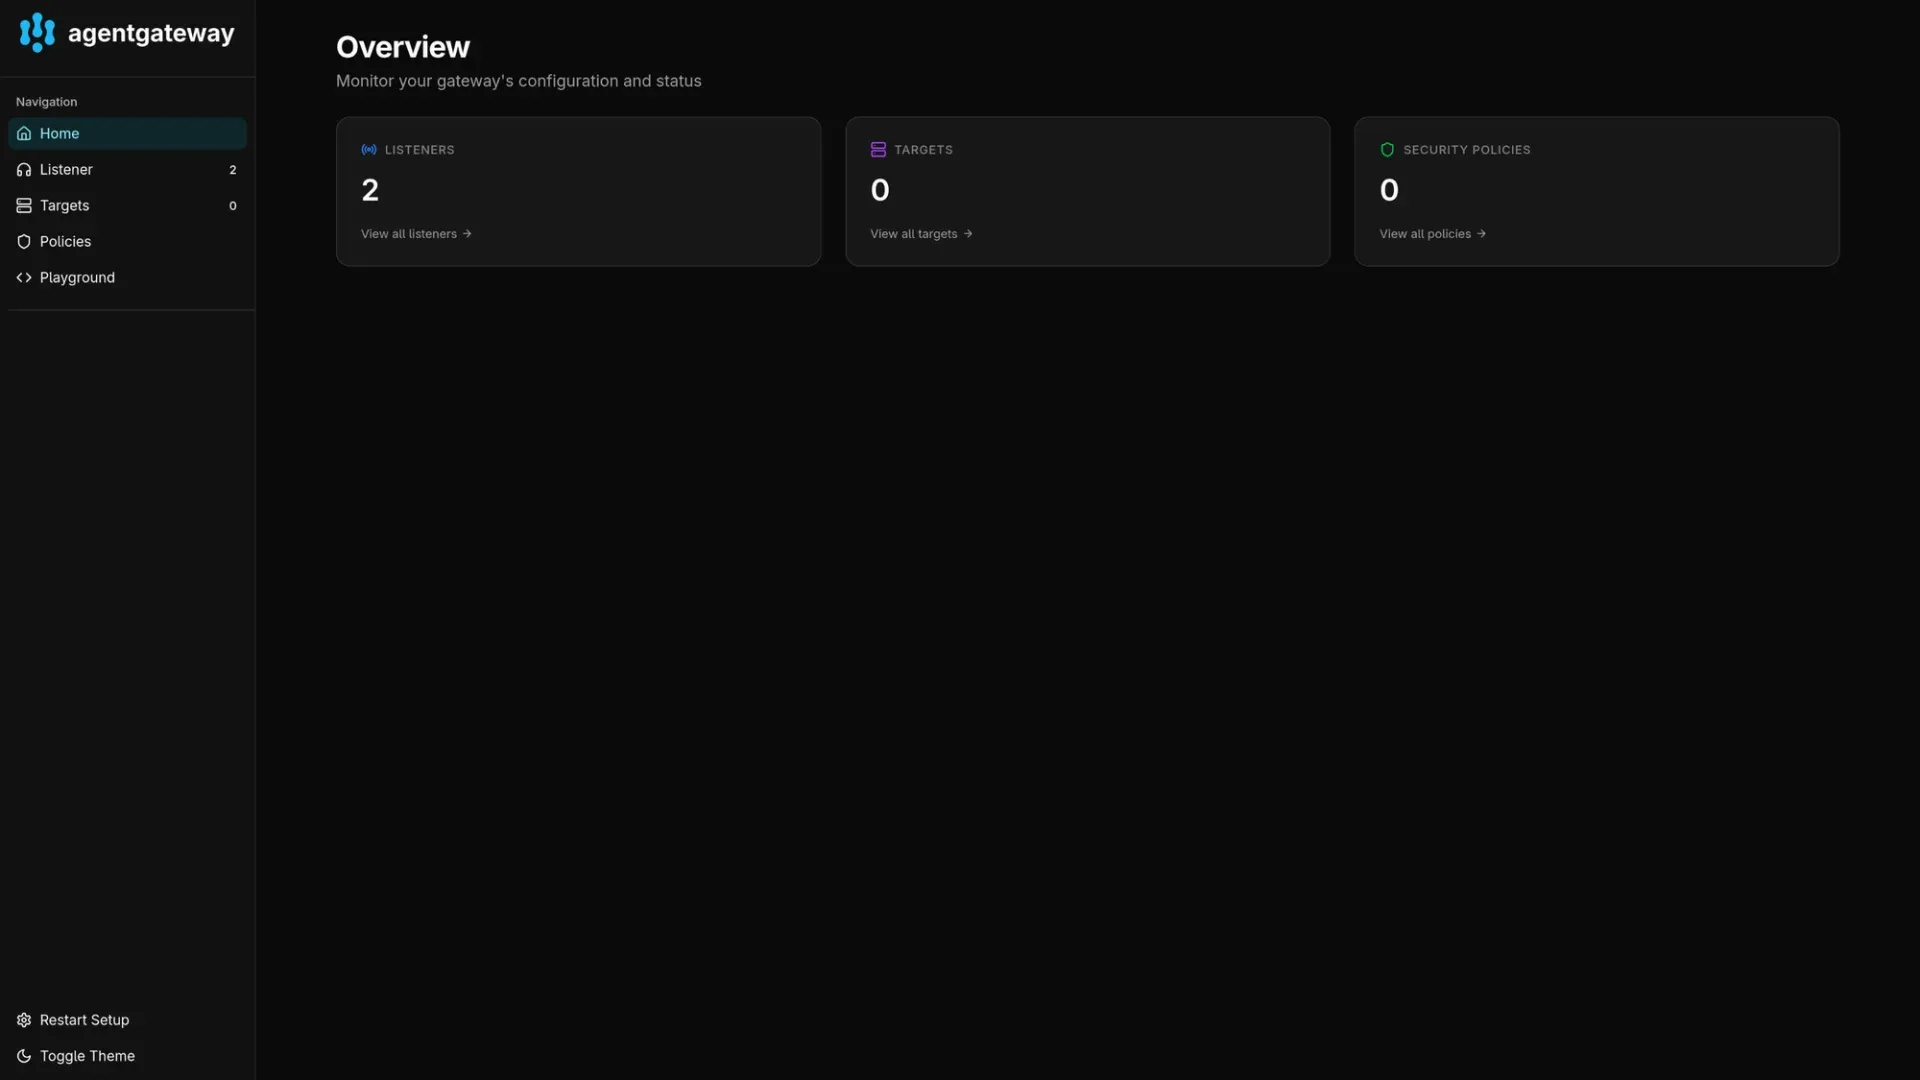
Accessing the admin dashboard
Once the instance is ready, you can access the administrative interface on the deployment's port 19000 by default. In order to let the playground (or MCP inspector) access the MCP listener, you also should forward 8080 or the port you decided to configure when deploying the gateway.
kubectl --namespace=default port-forward \
deployment/agent-gateway \
--address 127.0.0.1 \
19000:19000 \
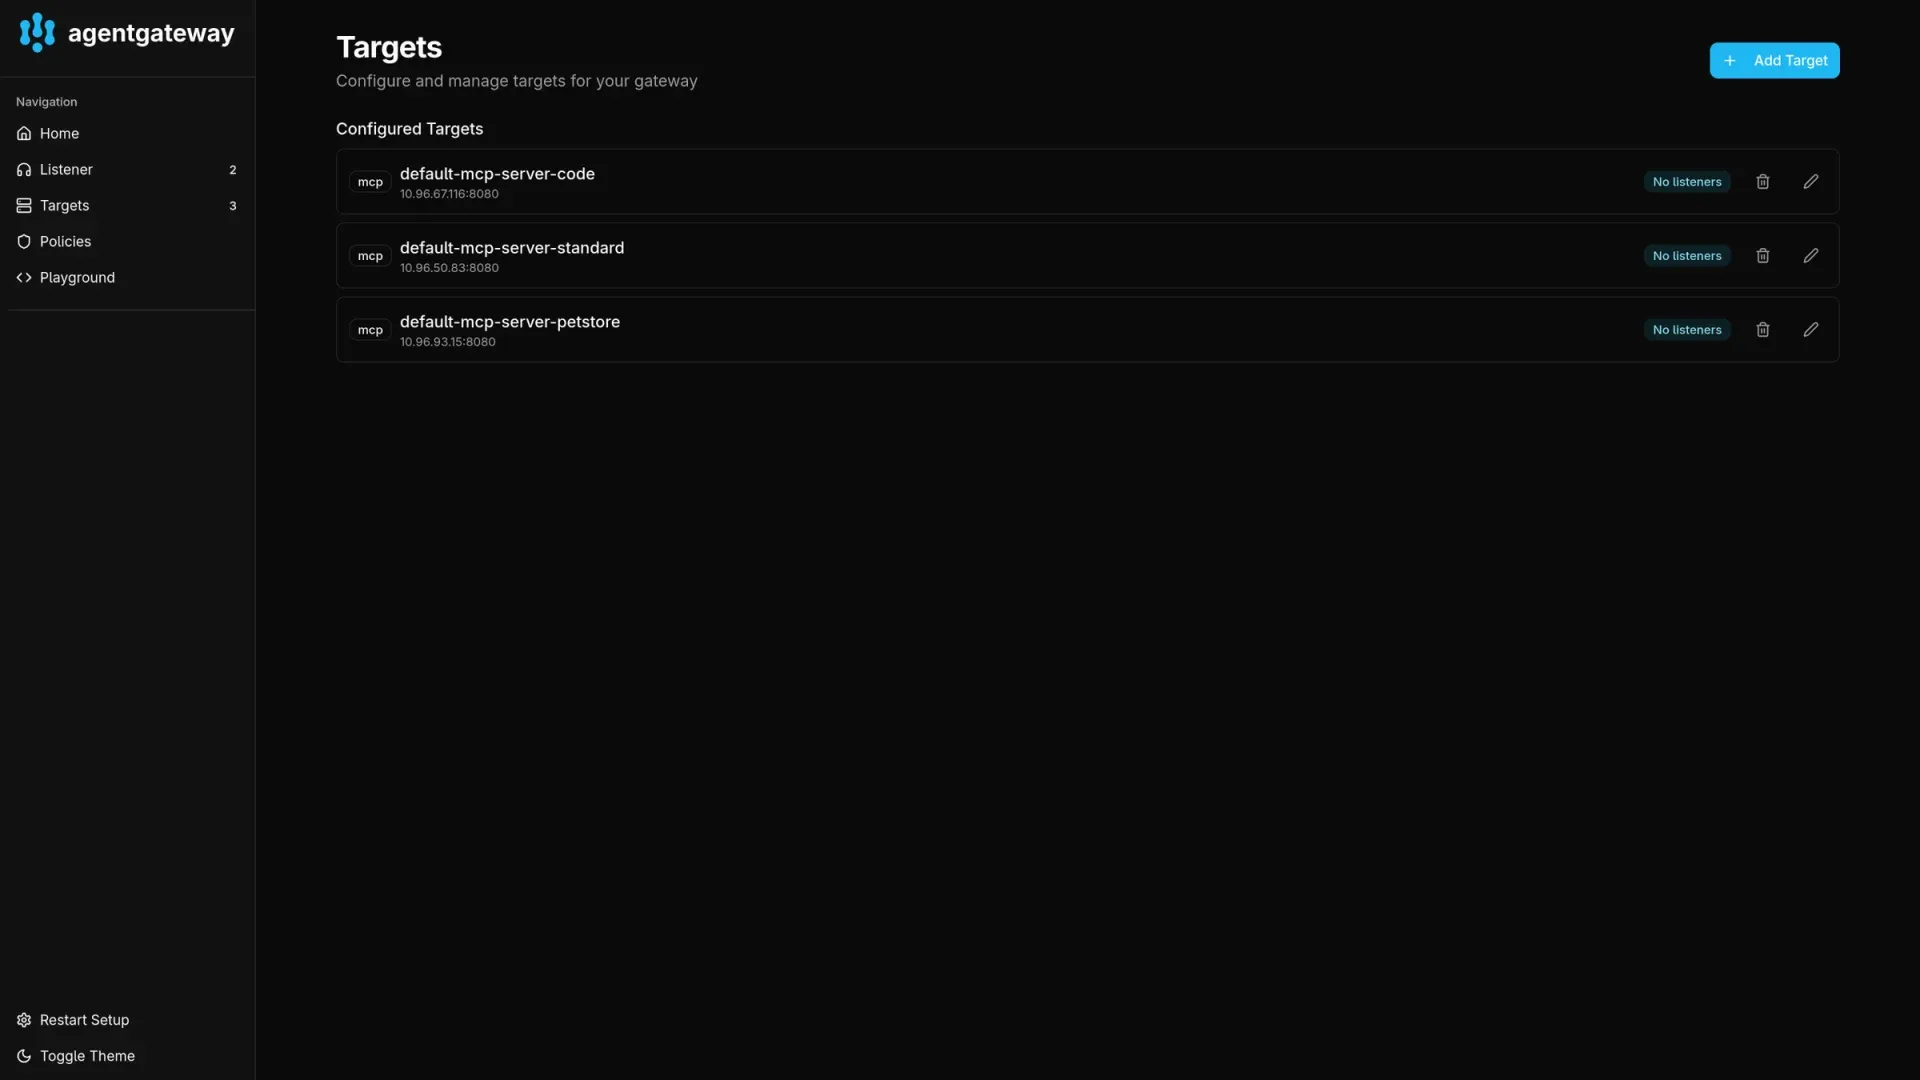
8080:8080Once the ports are forwarded you can visit http://127.0.0.1:19000 to view the admin interface. You will see the listeners but no MCP servers yet as they are not yet deployed.
Deploying MCP servers
In order to assess the viability of Agent Gateway as a potential solution for dynamic discovery of MCP servers, we can deploy three distinct types of servers.
- A server that uses HTTP transport (SSE).
- A server that only supports STDIO transport.
- An OpenAPI server.
MCP servers using SSE transport
At the time of writing the Agent Gateway does not support StreamableHTTP transport neither as a listener nor for targets (#144).
Servers that support SSE transport can very easily be deployed. Conceptually, these deployments looks like shown below.
graph TD
    A[Kubernetes Service] -->|port 8080| B[MCP Server Deployment]
    B -->|containerPort| C[Container Image]
    C -->|Runs| D[MCP Server Process]
All you need is the ability to expose it as a service with appProtocol: kgateway.dev/mcp set. For example, here we deploy the everything MCP server from docker hub.
docker.io/mcp/everything:latest) available today is a bit flaky, but should hopefully be fixed in a future release via this pull request.module "mcp_server_standard" {
source = "github.com/abn/mcp-dynamic-discovey-poc//modules/mcp-server"
name = "mcp-server-standard"
namespace = var.mcp_servers_namespace
container = {
image = "docker.io/mcp/everything:latest"
port = 3001
}
command = "npm"
args = ["run", "start:sse"]
}Terraform snippet for deployment (see below for manifest)
Deployment
kubectl --namespace=default apply -f- <<EOF
apiVersion: apps/v1
kind: Deployment
metadata:
  labels:
    app: mcp-server-standard
  name: mcp-server-standard
  namespace: default
spec:
  selector:
    matchLabels:
      app: mcp-server-standard
  template:
    metadata:
      labels:
        app: mcp-server-standard
    spec:
      containers:
      - args:
        - run
        - start:sse
        command:
        - npm
        image: docker.io/mcp/everything:latest
        name: mcp-server-standard
        command:
          - npm
        args:
          - run
          - start:sse
        ports:
        - containerPort: 3001
          protocol: TCP
EOF
Service
kubectl --namespace=default apply -f- <<EOF
apiVersion: v1
kind: Service
metadata:
  labels:
    app: mcp-server-standard
  name: mcp-server-standard
  namespace: default
spec:
  selector:
    app: mcp-server-standard
  ports:
  - appProtocol: kgateway.dev/mcp
    port: 8080
    protocol: TCP
    targetPort: 3001
EOF
MCP servers using stdio transport
A lot of the available community MCP servers unfortunately still only support stdio as transport. To make these usable in our environment, we enlist help from the agentgateway binary acts as a proxy to the stdio server. In order to make this possible we do the following,
- Make the
agentgatewaybinary from the Agent Gateway container available in the target server's container via a shared volume. - Generate a
config.jsonfile for the Agent Gateway process such that the target is configured statically.
graph TD
    A[Kubernetes Service] -->|port 8080| B[MCP Server Deployment]
    B -->|Init Container| C[Copy agentgateway binary]
    C -->|Writes to| D[emptyDir Volume]
    B -->|Main Container| E[Target Container]
    E -->|Mounts| D
    E -->|Mounts| F[ConfigMap]
    F -->|Contains| G[agentgateway config]
    E -->|Runs| H[agentgateway binary]
    H -->|stdio| I[Target Process]
We can deploy the node code sandbox server as an example here. This includes a config that enables the MCP listener as well as an MCP target that executes the container local command required to start the MCP server.
node dst/server.js command inside the server container. You can just as easily run an arbitrary server by replacing the container image with ghcr.io/astral-sh/uv:python3.13-bookworm for Python servers and docker.io/node:lts-slim for Node servers; and then specifying the uvx or npx command as required.module "mcp_server_stdio" {
source = "github.com/abn/mcp-dynamic-discovey-poc//modules/mcp-server"
name = "mcp-server-code"
namespace = var.mcp_servers_namespace
container = {
image = "docker.io/mcp/node-code-sandbox:latest"
}
stdio_transport = true
command = "node"
args = ["dist/server.js"]
}Terraform snippet for deployment (see below for manifest)
Config Map
kubectl --namespace=default apply -f- <<EOF
apiVersion: v1
kind: ConfigMap
metadata:
  labels:
    app: mcp-server-code
  name: mcp-server-code-config
  namespace: default
data:
  config.json: |
    {
      "type": "static",
      "listeners": [
        {
          "name": "sse",
          "protocol": "MCP",
          "sse": {
            "address": "[::]",
            "port": 8080
          }
        }
      ],
      "targets": {
        "mcp": [
          {
            "name": "node-code-sandbox",
            "stdio": {
              "cmd": "node",
              "args": ["dist/server.js"]
            }
          }
        ]
      }
    }
EOF
Deployment
kubectl --namespace=default apply -f- <<EOF
apiVersion: apps/v1
kind: Deployment
metadata:
  labels:
    app: mcp-server-code
  name: mcp-server-code
  namespace: default
spec:
  selector:
    matchLabels:
      app: mcp-server-code
  template:
    metadata:
      labels:
        app: mcp-server-code
    spec:
      containers:
      -
      - name: mcp-server
        image: docker.io/mcp/node-code-sandbox:latest
        command:
          - /agentgateway/agentgateway
        args:
          - --file
          - /agentgateway/config.json
        volumeMounts:
        - mountPath: /agentgateway/agentgateway
          mountPropagation: None
          name: executable
          subPath: agentgateway
        - mountPath: /agentgateway/config.json
          mountPropagation: None
          name: config
          subPath: config.json
      initContainers:
      - name: copy-agentgateway
        image: ghcr.io/agentgateway/agentgateway:0.5.1-ext
        imagePullPolicy: IfNotPresent
        command:
          - cp
          - -r
          - /bin/agentgateway
          - /mnt/
        volumeMounts:
        - mountPath: /mnt/
          mountPropagation: None
          name: executable
      volumes:
      - emptyDir: {}
        name: executable
      - configMap:
          defaultMode: 420
          name: mcp-server-code-config
          optional: false
        name: config
EOF
Service
kubectl --namespace=default apply -f- <<EOF
apiVersion: v1
kind: Service
metadata:
  labels:
    app: mcp-server-code
  name: mcp-server-code
  namespace: default
spec:
  selector:
    app: mcp-server-code
  ports:
  - appProtocol: kgateway.dev/mcp
    port: 8080
    protocol: TCP
    targetPort: 8080
EOF
MCP servers for OpenAPI
One of the great features that Agent Gateway provides out of the box, is its ability to expose OpenAPI servers via MCP. We can follow a pattern similar to the previous case where we create a static configuration for an Agent Gateway instance.
graph TD
    A[Kubernetes Service] -->|port 8080| B[MCP Server Deployment]
    B -->|Init Container| C[Download OpenAPI Schema]
    C -->|Writes to| D[emptyDir Volume]
    B -->|Main Container| E[agentgateway Container]
    E -->|Mounts| D
    E -->|Mounts| F[ConfigMap]
    F -->|Contains| G[agentgateway config]
    E -->|Runs| H[agentgateway binary]
    H -->|OpenAPI| I[External API Service]
module "mcp_server_openapi" {
  source = "github.com/abn/mcp-dynamic-discovey-poc//modules/mcp-server"

  name      = "mcp-server-petstore"
  namespace = var.mcp_servers_namespace
  container = {}
  openapi = {
    enabled    = true
    host       = "petstore3.swagger.io"
    port       = 443
    schema_url = "https://raw.githubusercontent.com/agentgateway/agentgateway/refs/heads/main/examples/openapi/openapi.json"
  }
}
Terraform snippet for deployment (see below for manifest)
Config Map
kubectl --namespace=default apply -f- <<EOF
apiVersion: v1
kind: ConfigMap
metadata:
  labels:
    app: mcp-server-petstore
  name: mcp-server-petstore-config
  namespace: default
data:
  config.json: |
    {
      "type": "static",
      "listeners": [
        {
          "name": "sse",
          "protocol": "MCP",
          "sse": {
            "address": "[::]",
            "port": 8080
          }
        }
      ],
      "targets": {
        "mcp": [
          {
            "name": "mcp-server-petstore",
            "openapi": {
              "host": "petstore3.swagger.io",
              "port": 443,
              "schema": {
                "file_path": "/schema/openapi.json"
              }
            }
          }
        ]
      }
    }
EOF
Deployment
kubectl --namespace=default apply -f- <<EOF
apiVersion: apps/v1
kind: Deployment
metadata:
  labels:
    app: mcp-server-petstore
  name: mcp-server-petstore
  namespace: default
spec:
  selector:
    matchLabels:
      app: mcp-server-petstore
  template:
    metadata:
      labels:
        app: mcp-server-petstore
    spec:
      automountServiceAccountToken: true
      containers:
      - name: mcp-server
        image: ghcr.io/agentgateway/agentgateway:0.5.1
        imagePullPolicy: IfNotPresent
        args:
        - --file
        - /agentgateway/config.json
        volumeMounts:
        - mountPath: /agentgateway/config.json
          mountPropagation: None
          name: config
          subPath: config.json
        - mountPath: /schema/openapi.json
          mountPropagation: None
          name: openapi-schema
          subPath: openapi.json
      initContainers:
      - image: docker.io/alpine/curl:latest
        name: fetch-openapi-schema
        args:
        - -o
        - /schema/openapi.json
        - https://raw.githubusercontent.com/agentgateway/agentgateway/refs/heads/main/examples/openapi/openapi.json
        volumeMounts:
        - mountPath: /schema
          mountPropagation: None
          name: openapi-schema
      volumes:
      - configMap:
          defaultMode: 420
          name: mcp-server-petstore-config
          optional: false
        name: config
      - emptyDir: {}
        name: openapi-schema
EOF
Service
kubectl --namespace=default apply -f- <<EOF
apiVersion: v1
kind: Service
metadata:
  labels:
    app: mcp-server-petstore
  name: mcp-server-petstore
  namespace: default
spec:
  selector:
    app: mcp-server-petstore
  ports:
  - appProtocol: kgateway.dev/mcp
    port: 8080
    protocol: TCP
    targetPort: 8080
EOF
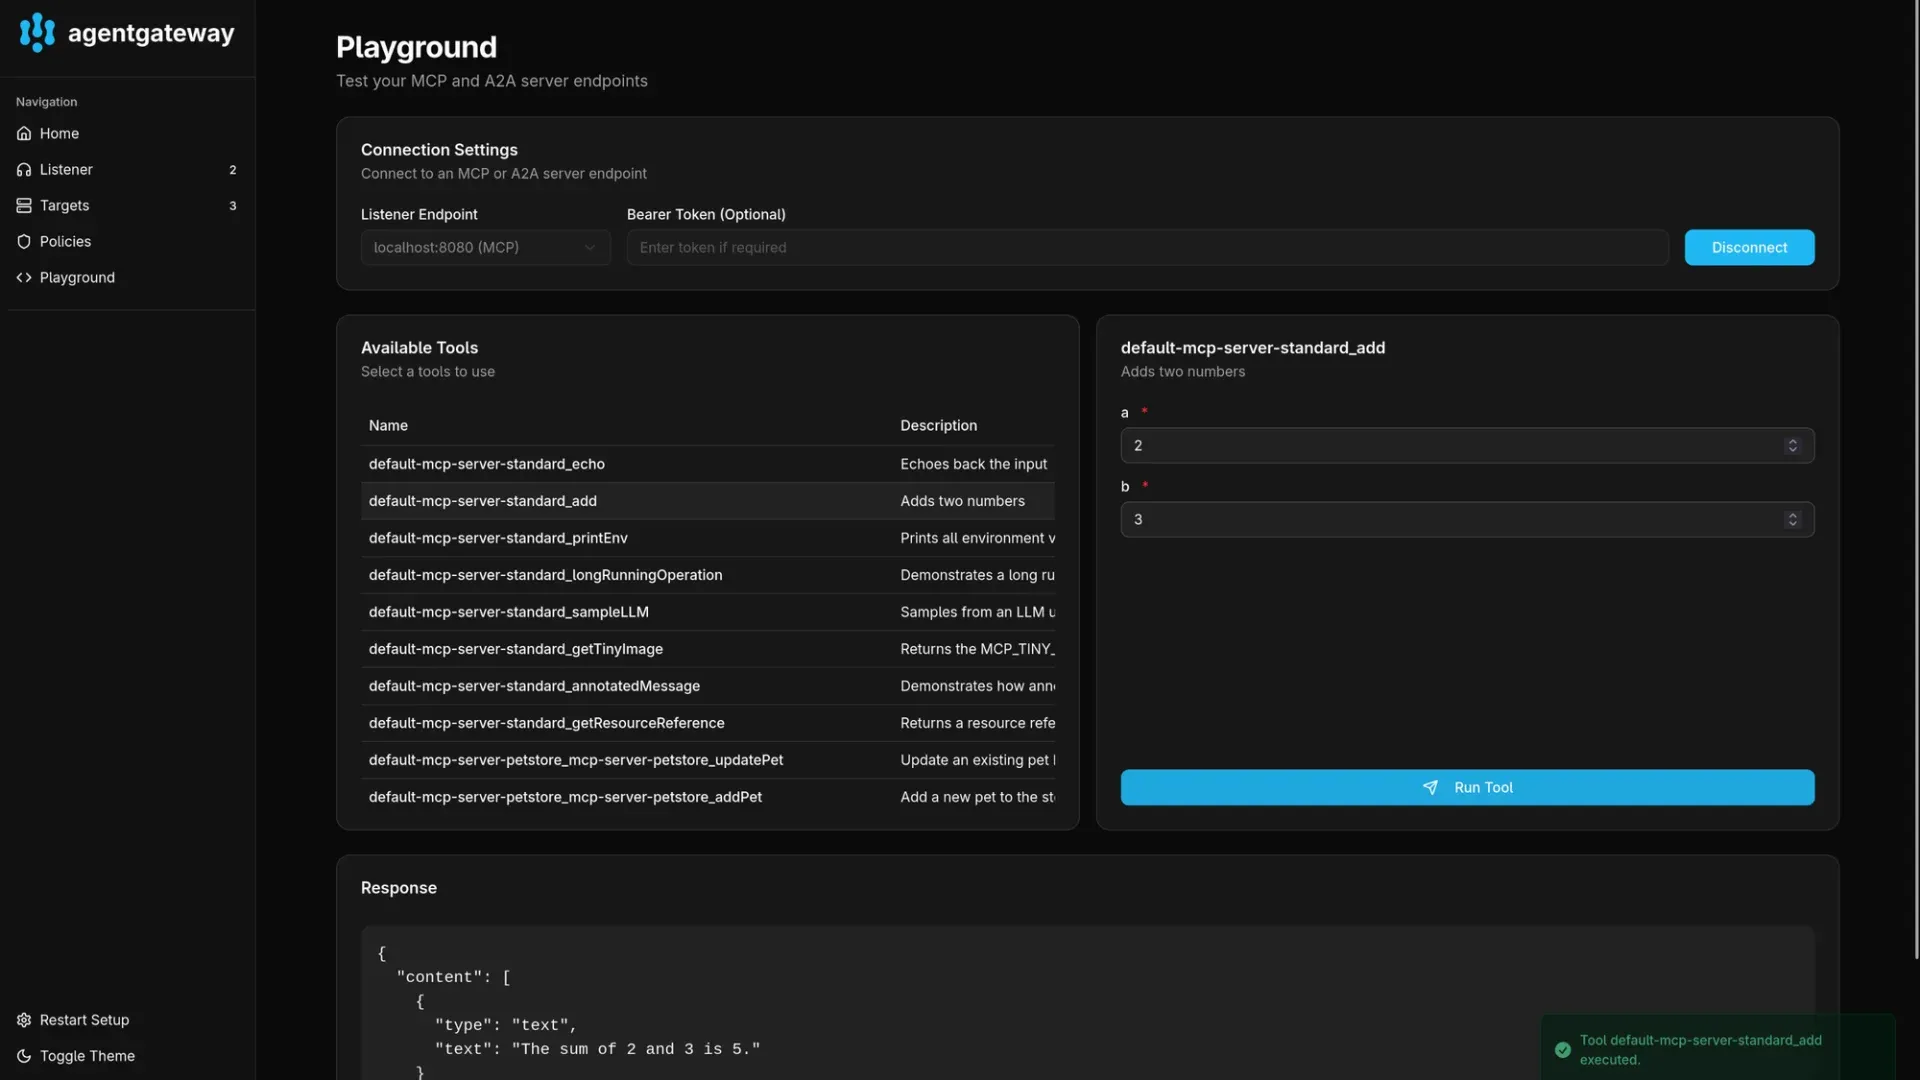
The Playground
When you access the admin interface for the gateway (see above for the required port-forwarding command), you can see an included playground. This provides a convenient way to list all available tools and test them. This is similar to the MCP inspector.
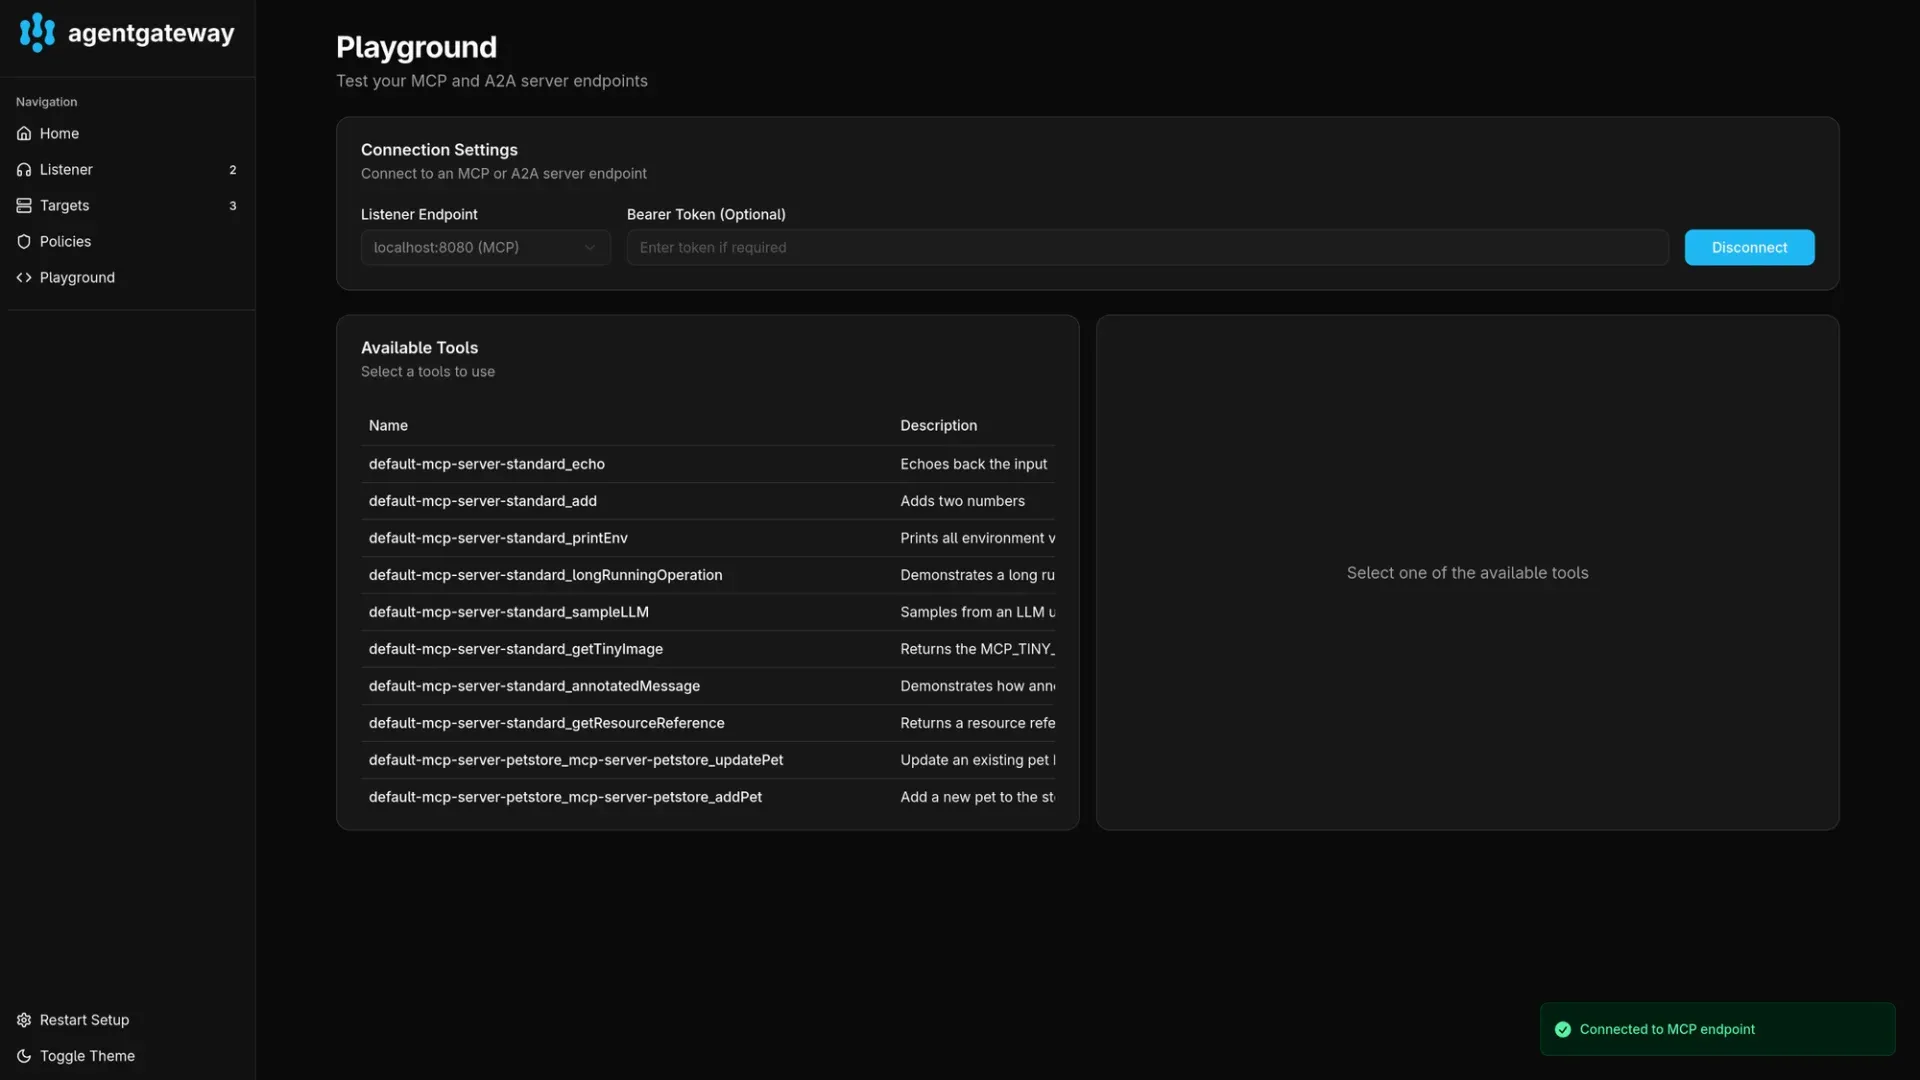

You can choose the MCP listener endpoint and then connect to list and test all available tools from all available targets. In the above screenshot you can see tools from multiple MCP servers deployed above and the testing on one of those tools.
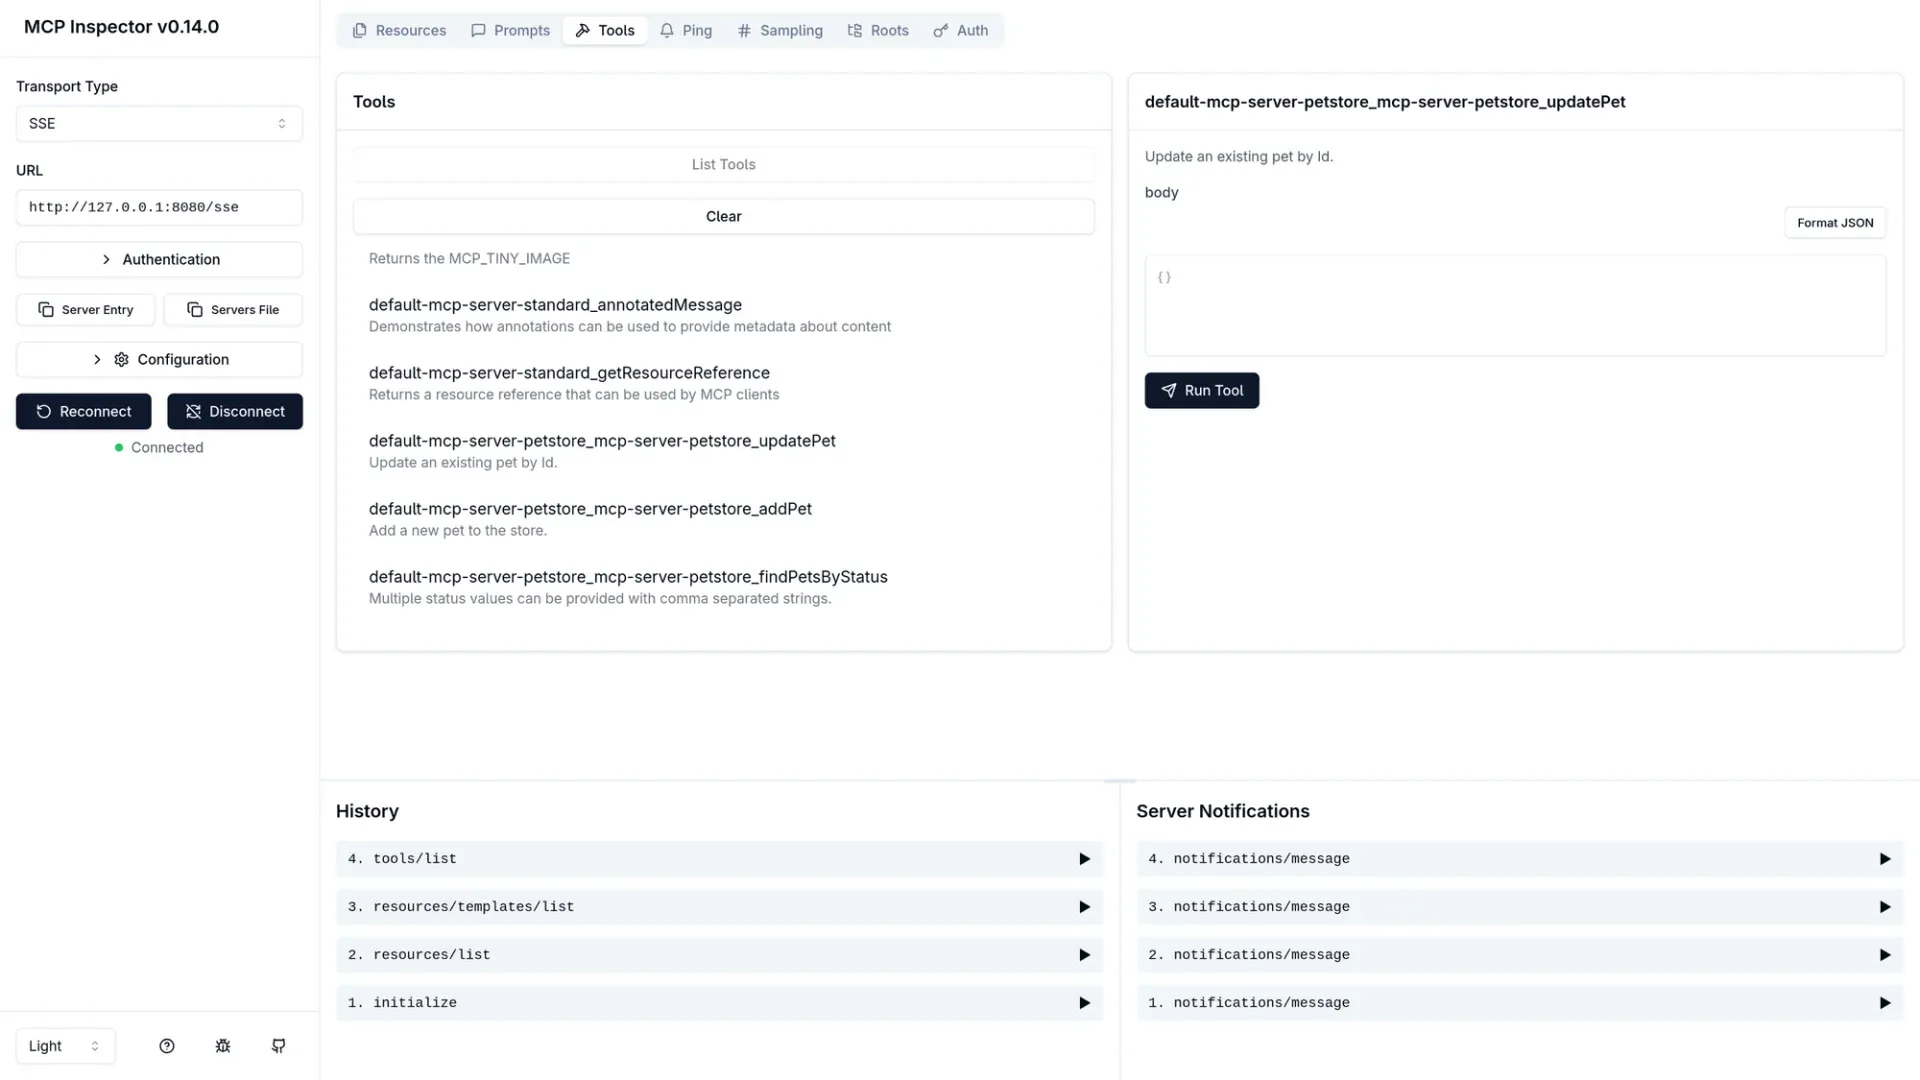
You can also use the MCP Inspector to list all tools to validate the multiplexing. For example, you can use the following command to list all tools once you have port-forwarding started.
npx @modelcontextprotocol/inspector \
  --cli http://localhost:8080/sse \
  --method tools/list \
  | jq -r '.tools[] | .name
If you see an error like that shown below, this is likely because the everything server is crashing as mentioned above. You can either delete the pod to force a restart, or simply retry the above command a few times to receive a good response once the server recovers.
Failed to connect to MCP server: MCP error -32603: Failed to list connections: Transport error: error sending request for url (http://10.96.50.83:8080/sse)
Failed to connect to MCP server: MCP error -32603: Failed to list connections: Transport error: error sending request for url (http://10.96.50.83:8080/sse)

Failed with exit code: 1
Error output if one of the MCP servers is unhealthy
Final Remarks
For teams needing to make dynamically deployed MCP servers available to agents via a single endpoint, Agent Gateway offers a powerful and immediate solution. It allows you to leverage off-the-shelf components to build a discovery and multiplexing layer for your AI agents.
However, this approach comes with trade-offs. Relying on xDS ties you to an Envoy-based ecosystem, and the projects themselves — kgateway and Agent Gateway — are still maturing. This space is volatile, with competing standards and rapid evolution. Despite these challenges, the capabilities demonstrated by Agent Gateway are a promising sign of what's to come, and the stability of solutions in this area will only improve.
Future Explorations
Looking ahead, there are other avenues to explore. Solutions like proxyless gRPC could empower agents to handle server discovery themselves, removing the need for a central gateway.
More immediately, questions remain about multi-tenancy and security. Agent Gateway provides mechanisms for JWT-based authentication and RBAC policies to control access to tools. A future post will need to explore how these features align with the evolving MCP authorization specification. The long-term adoption of Agent Gateway for multiplexing may hinge on how elegantly this security story unfolds.
Hopefully, a follow-up post will cover the authorization story with Agent Gateway soon. Stay tuned!